;rgba(153,153,153,0.1);rgba(153,153,153,0.5)" dur="2s" repeatCount="indefinite" /></rect></svg>)
This is a stitch used to transfer information from a paper pattern to the fabric. On a commercial pattern you will see little circles within the pattern piece. These mark where a tailor tack should be made.

You can use tailor tacks as a temporary way of marking fabric to show dart positions, pleats, pocket positions, gathering positions and fold lines to name a few.
How to tailor tack
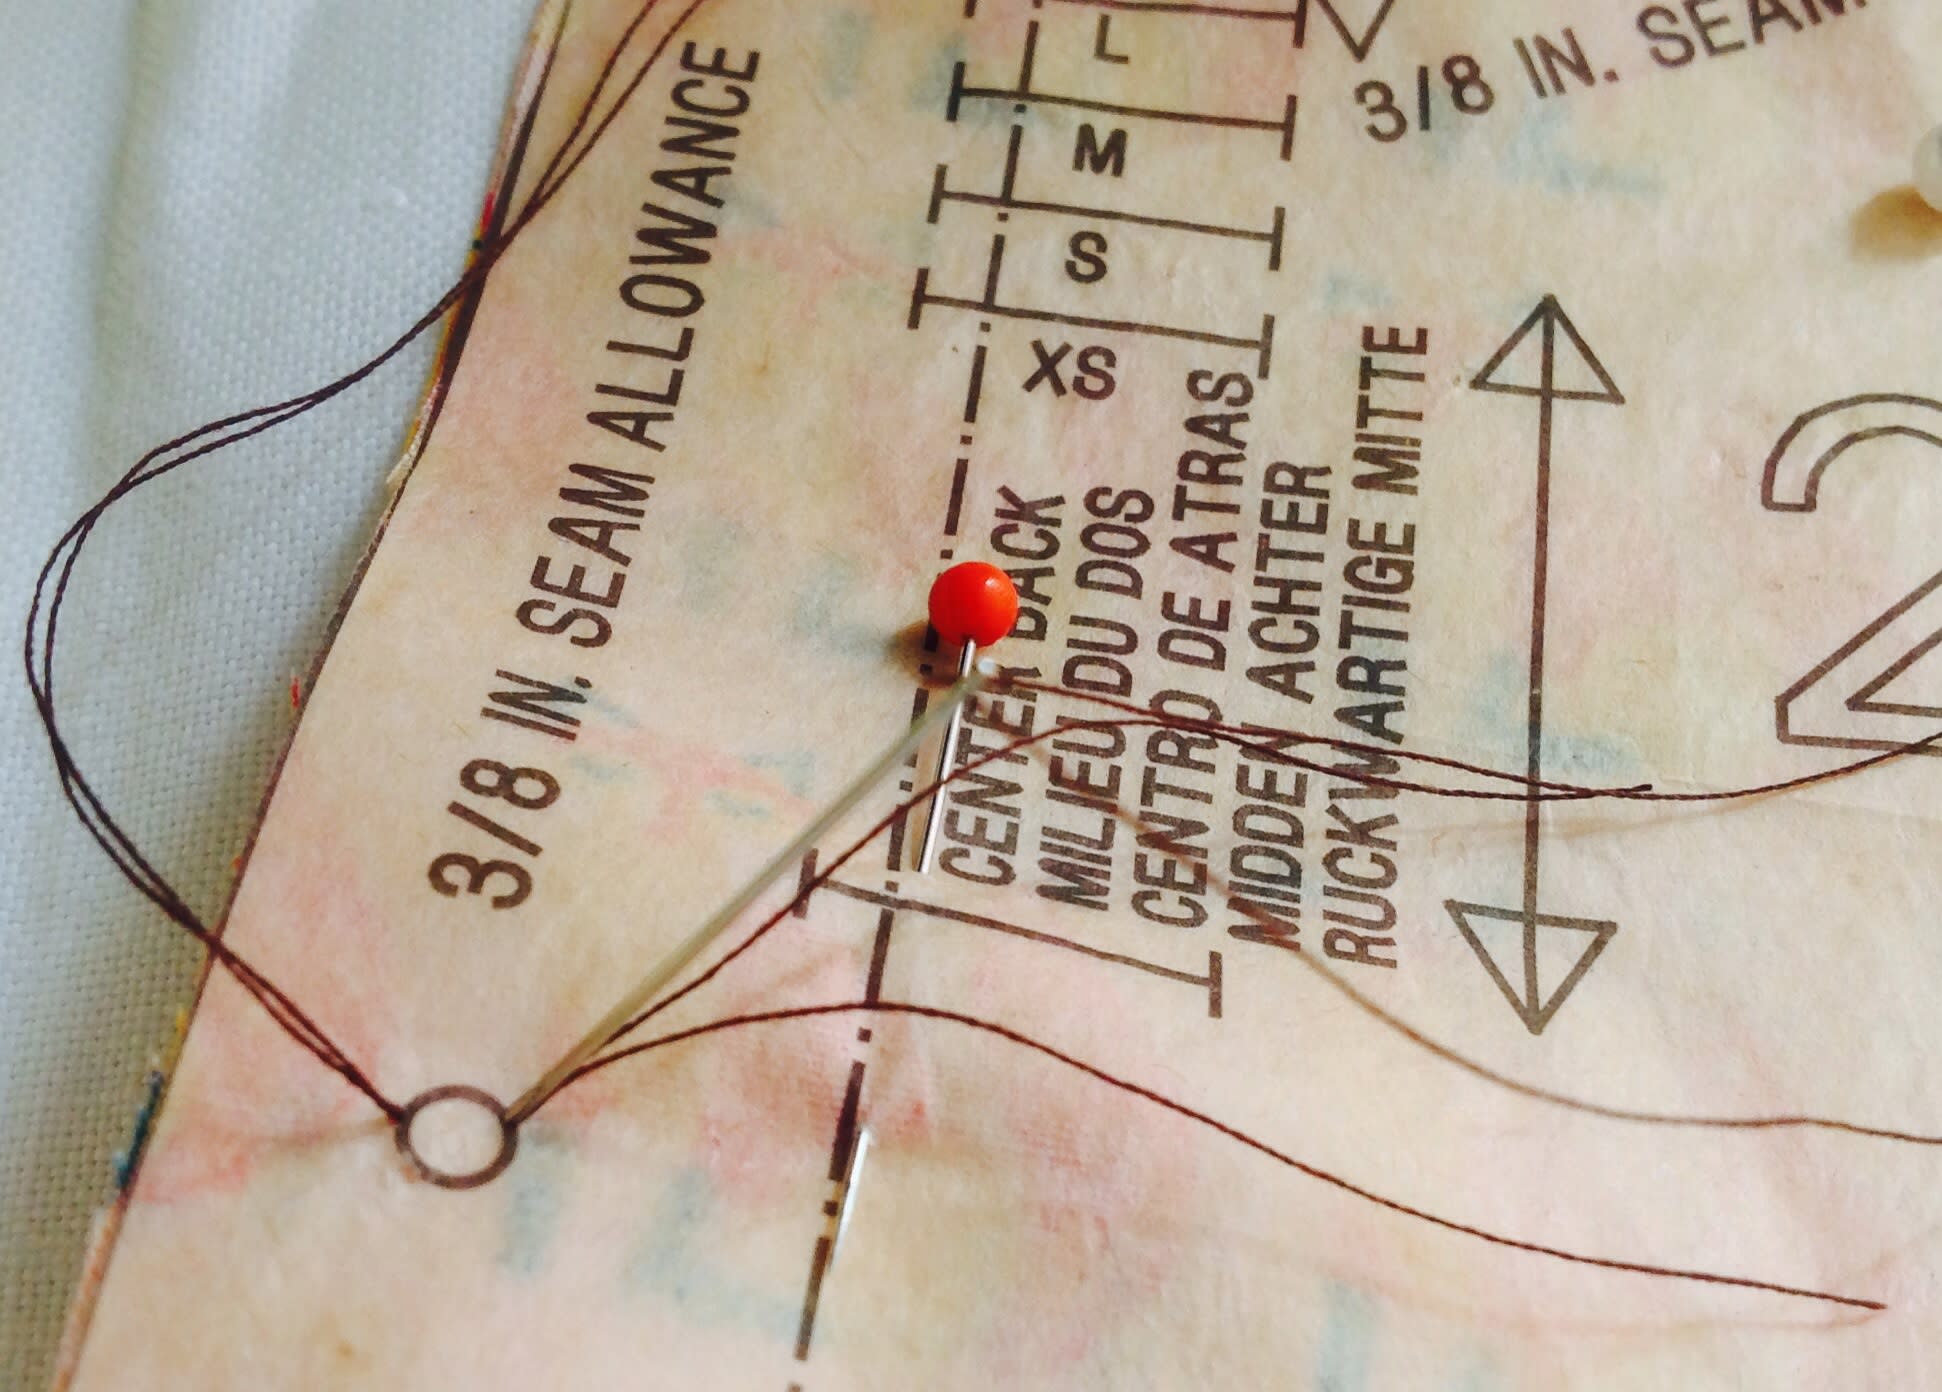
Once you have cut out the pattern piece, keep the pattern pinned to the fabric. Using a double thread, about the length of your arm and in a contrasting colour, thread your needle.

Plunge the needle into 1 side of the circle,check you go through all the layers.

Leave a tail about the length of your finger on top and gently pull the thread through.

You are now going to repeat the stitch and create a loop, leaving the loop the length of your finger.
Bring the needle back up again and cut the thread leaving a tail the length of your finger.
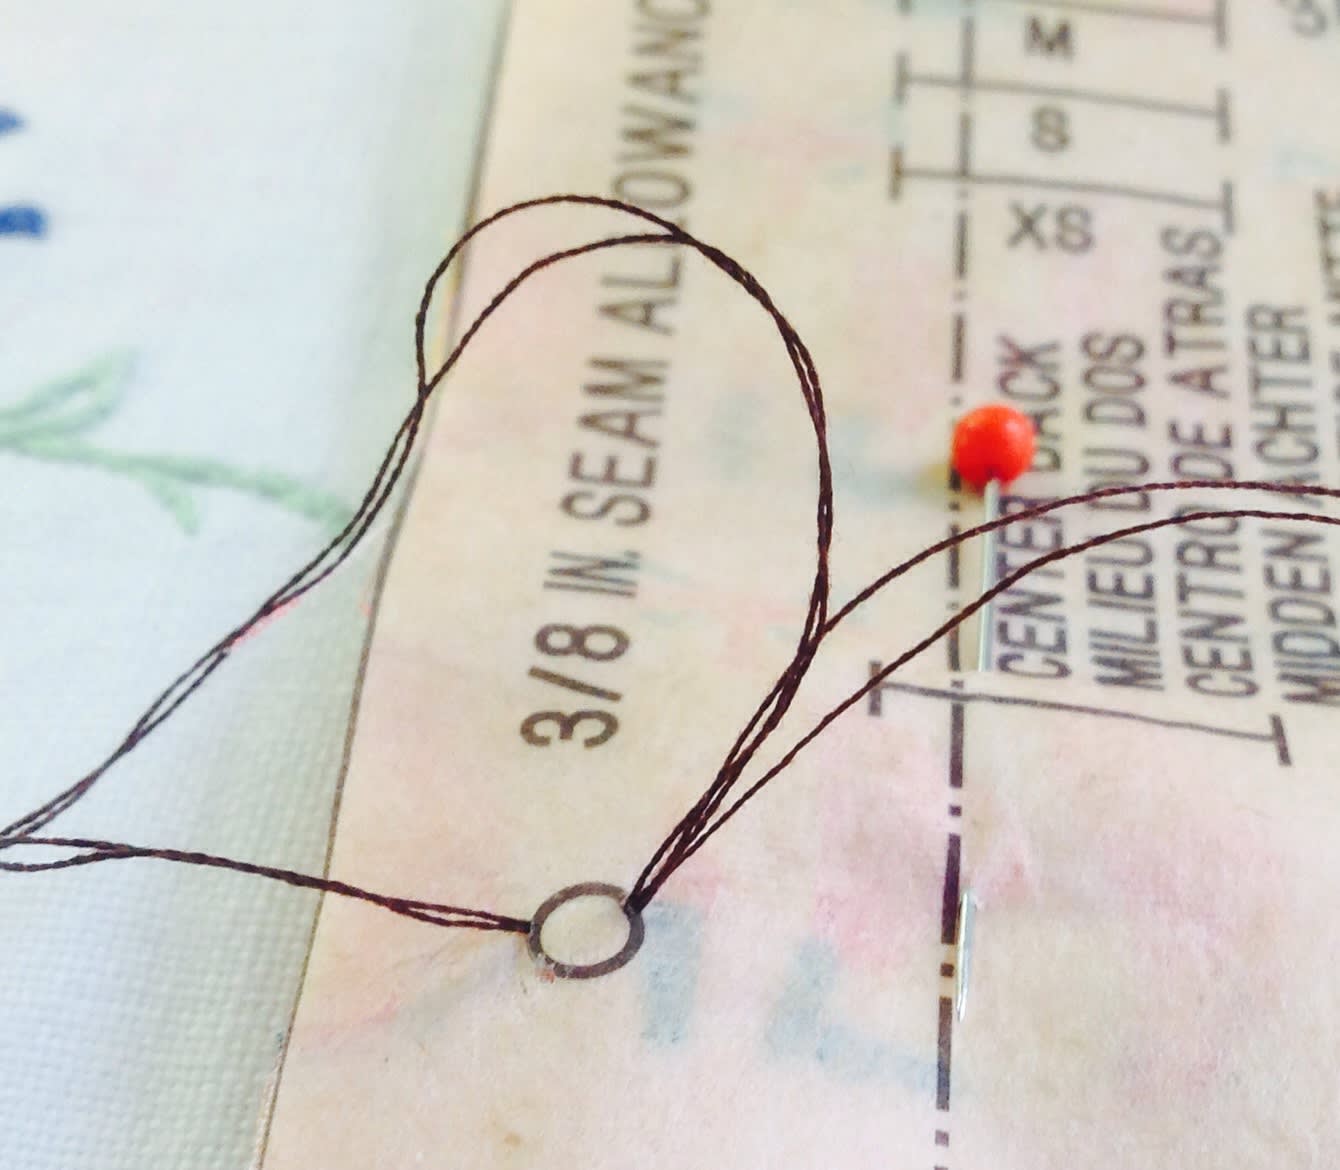
Cut the tail and then through he loop.

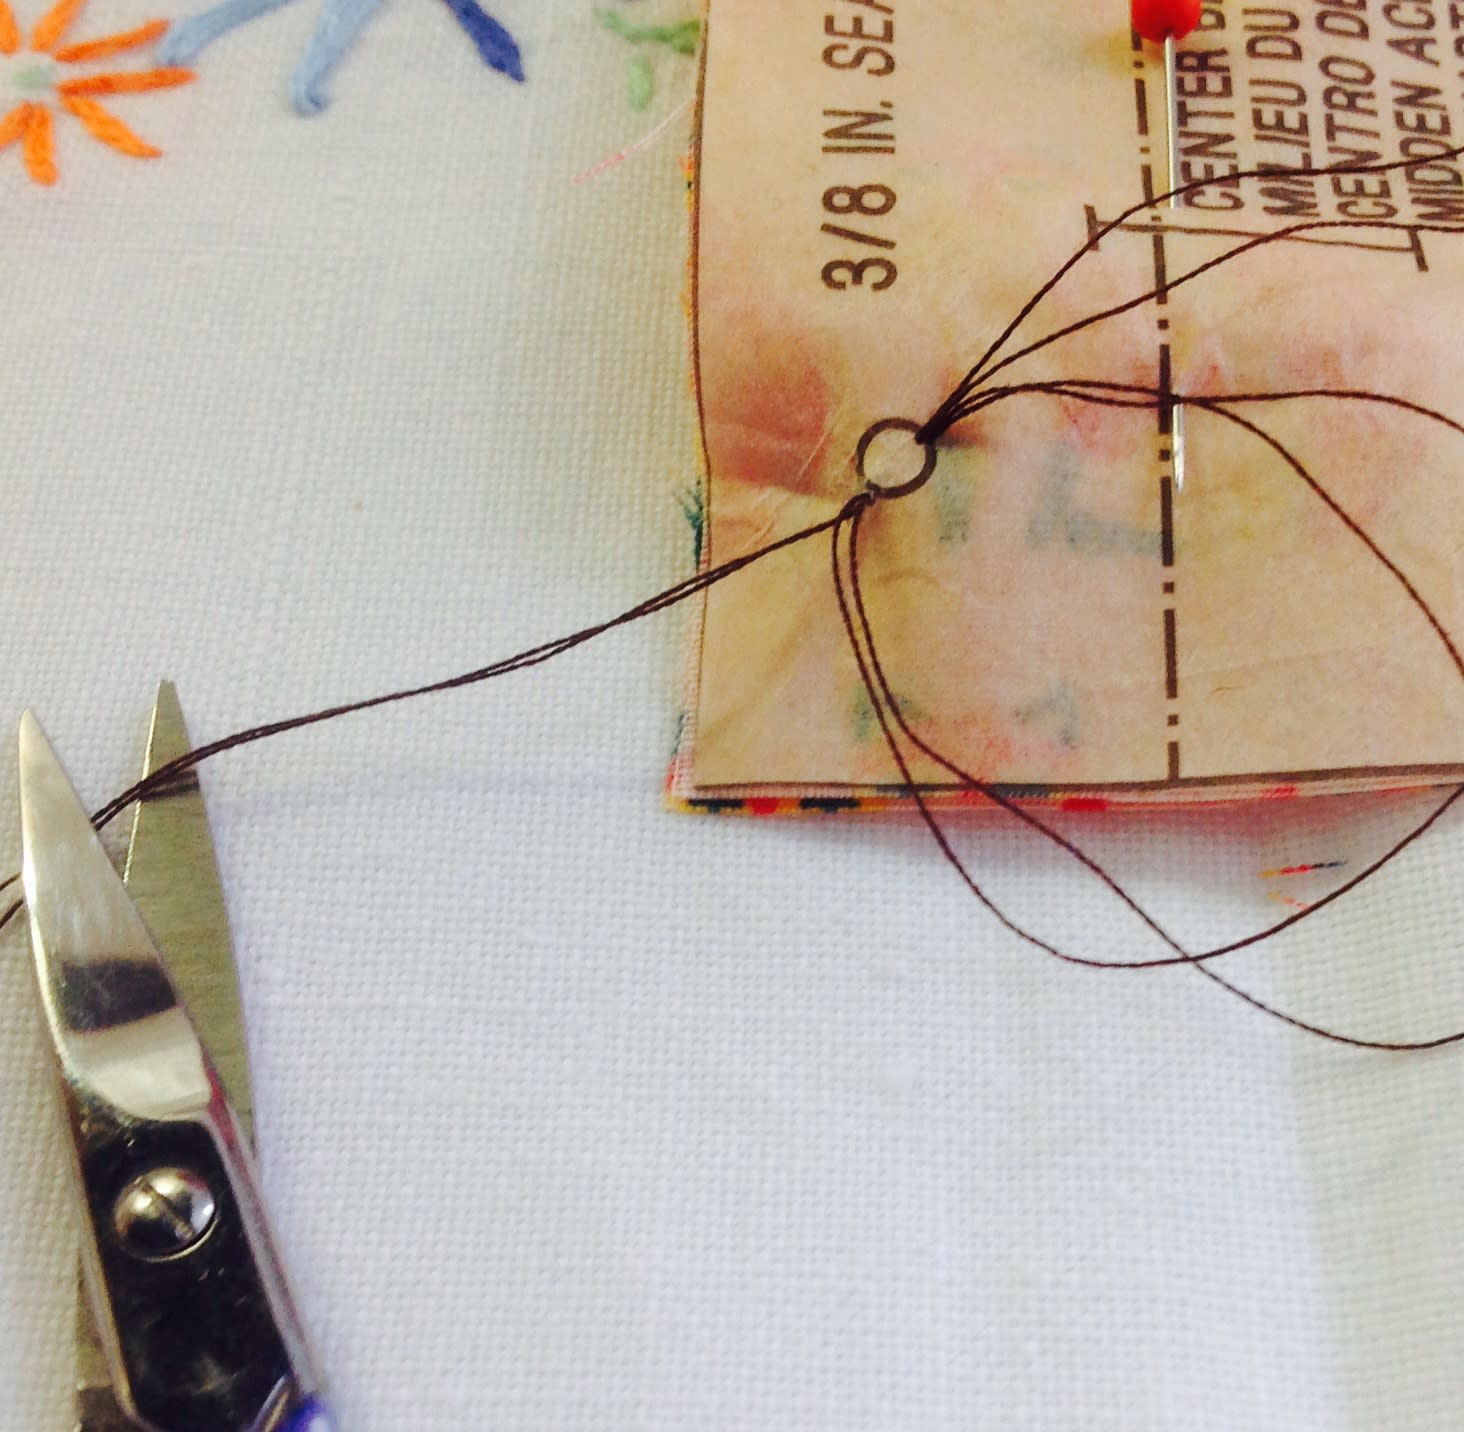
Peel the paper pattern away from the fabric.


Carefully separate the fabric layers and snip the threads in between.

You should now have a thread mark on both layers of your fabric pattern piece.

Ta dah! Please do leave feedback if you have any comments and, as always, remember that sewing is good for the soul xx
3 Responses
how do you then match these up for the dart?
Thankou sooo much for that clear explanation….first time I’ve really understood it!
I knew that I wasn’t imagining tailor tacks. Thank you 😊